We’ve begun assembling the first prototype of the car. Most of the parts have arrived and we’re closing in on completing the physical build. Up next: integrating electronics and ROS.
Progress
In the past month, we have:
- Secured sponsorship from SparkFun, AdaFruit.
- Specced parts and developed bill of materials (BOM).
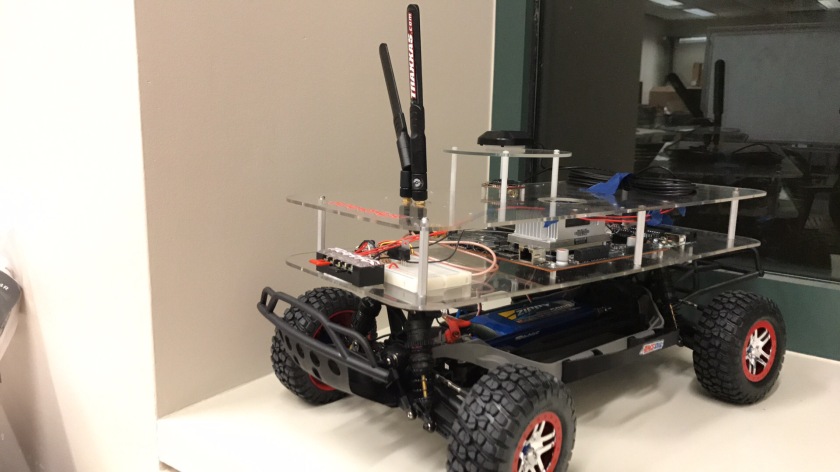
- Machined our beta platform and mounted GPS/IMU/Jetson/Arduino/Breadboard/Antennas + various other PCBs.
- Setup and configured Jetson board.
- Developed our first ROS node communicating with the Jetson over UART.
Parts and Procurement
Before assembling a robot, one needs parts! We spent the first two weeks researching, arranging sponsorships and, finally, ordering components. Speccing out physical components was new to me (Johan). In software engineering, you can easily read up on packages and play around with them before committing them into your build. Taking lead time and cost of ordering physical pieces into account was novel but necessary.
While we are loosely basing our model off the MIT RACECAR platform, we wanted to make a well-informed decisions on each piece we ordered. Here are the most significant components we’ve acquired:
- Traxxas Slash 4×4 Platinum Edition – Robust, well-built RC chassis with brushless motor.
- Nvidia Jetson TX1 – First-class embedded GPU for CV + control.
- Razor 9dof IMU – Highly rated IMU.
- Vedder Electronic Speed Controller (VESC) – Open source ESC, only option with clean control for low-speed
In addition we also picked up a slew of screws and standoffs, batteries, charging equipment, soldering gear, sensors, Arduinos, and other necessary PCBs. Once we’ve smoothed out the build, we will post our entire BOM. We also plan to highlight some of these parts in future writeups.
Preparing the Platform
Using the UW Comotion makerspace’s laser cutter, we built a simple acrylic 2-level platform that we could drill out and mount everything onto. This is our first iteration, so we only added holes for the Jetson to the CAD model and spaced the rest out physically. Once we were ready to mount our the other chips, we etched holes and drilled them out at the Mech-E machine shop. To support the heavier platform, we also purchased stiffer springs for the chassis. On Saturday we mounted everything onto the platform. We began setting up the power system (more details to come) and integrating the first PCBs.
Setting up Jetson
Getting started with the Jetson is extremely well documented. Nvidia has great documentation for setting it up and Jetsonhacks has suggestions for installing ROS onto the platform. Be sure to have > 40 GB available space your host computer for installing the Jetpack as it will use as much in temp files. We learned this the hard way on our first pass at flashing the Jetson.
I could dive into setbacks and the fried VESC, but in favor of concision I’ll sign off with a picture of the build.